How to Check Your Mac for Viruses and Malware 🖥️💣
Mac systems are known to be some of the most secure, but there is no guarantee that they will not become infected. Here's how to scan your Mac for viruses and malware.
Guide to scanning your Mac for viruses and malware | ENBLE
Thanks to several rigorous security measures Apple integrates into its computers, Macs are generally considered among the safest systems. However, there’s always an opportunity for malware and malicious threat actors to gain access 🕵️♂️ to your Mac. Relying on the built-in security features protecting your system may be well and good, but it can be useful to manually check whether a virus or malware has infiltrated your system without being detected. 🕵️♀️🔍
Table of Contents
- Performance downgrades
- Browser extensions
- Suspicious apps and downloads
- Full Disk Access
- Login Items
- Antivirus and malware scanner apps
Here’s how to check your Mac for viruses and malware. 👇
Performance Downgrades 🐢
One of the indications of possible malware and viruses infecting your Mac is a notable reduction in performance speed 🐌. One of the best ways to look into exactly what’s causing your Mac’s CPU to perform in a sluggish manner is via an app on your Mac called Activity Monitor.
Step 1: Open Applications > Utilities > Activity Monitor or press Command-Space to open Spotlight and search for “Activity Monitor.” Double-click the app to open it.
Step 2: In the Process Name field located under the CPU tab (which should be selected by default), look through whatever is listed and how much of the CPU percentage it requires to operate. If you’re unsure of any of the process names, simply type them into Google, which will inform you whether it’s something you should be worried about or not.
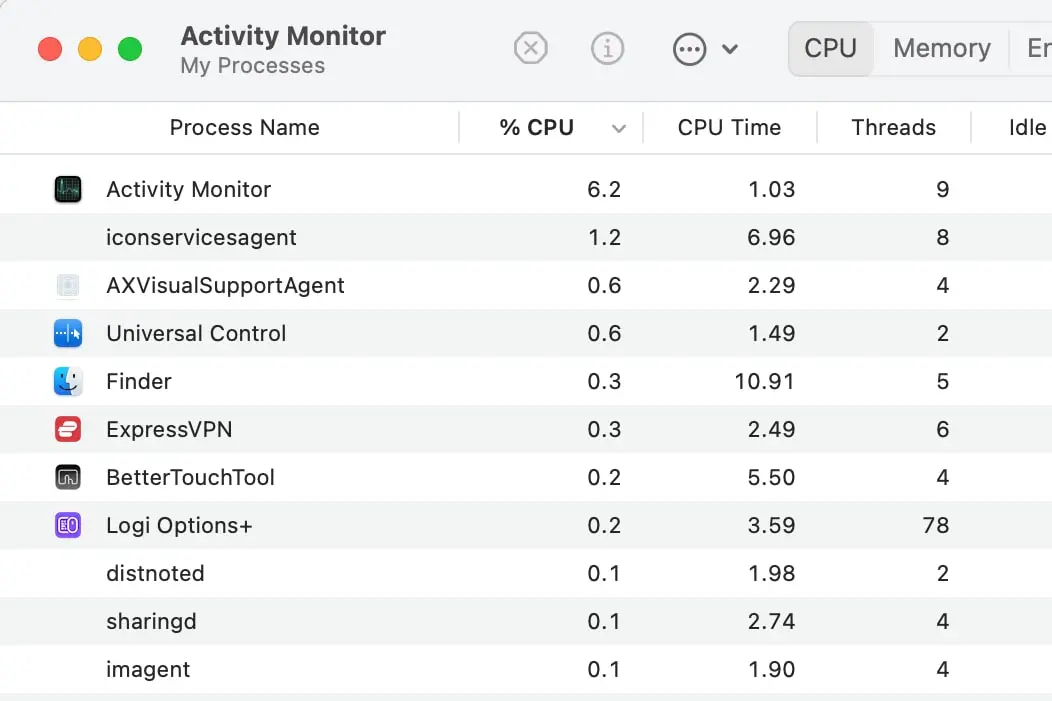
Step 3: If you do locate any harmful apps and malware within Activity Monitor, click the item and then select the X button at the top-left to terminate it.
Step 4: Similarly, open the Memory tab and analyze the Process Name section to see if there are any unknown or unusual process names you don’t recognize that are demanding a considerable amount of memory usage.
Step 5: Note that forcing a malicious app to close might temporarily solve the problem, but there’s every chance that if malware is on your Mac, the app will open up again and resume its nefarious activities 🤨. For a more permanent solution, head to the Antivirus and malware scanner apps section at the bottom of this guide.
Browser Extensions 🌐
When downloading apps, you can restrict your Mac to only installed apps from the App Store. There’s no such option for browser extensions, though – you can install them from third-party websites and stores – meaning there’s a chance you can end up adding something malicious to your computer 🦠.
If you’re using Google Chrome, for example, click the three dots on the far right side of the app, then select Extensions > Manage Extensions.
Scan through your browser extensions and remove any suspicious extensions that have been added.
Suspicious Apps and Downloads 📥
Checking the list of installed applications on your Mac should be something that’s performed on a regular basis to make sure you definitely installed them all and still want them installed.
Step 1: Open the Applications folder, located in the left sidebar of Finder.
Step 2: Look for any apps you didn’t install yourself. Right-click an app you want to remove and select Move to Trash. Don’t forget to empty the trash to permanently delete the app from your system.
Step 3: Naturally, any file downloaded from an unknown or untrusted source can potentially contain malware and viruses. Ever had a pop-up appear on your web browser that automatically downloads a file without your permission? Go to the Downloads folder on your Mac and delete anything you didn’t download yourself. As is the case with applications, be sure to empty the trash if you do remove any particular files.
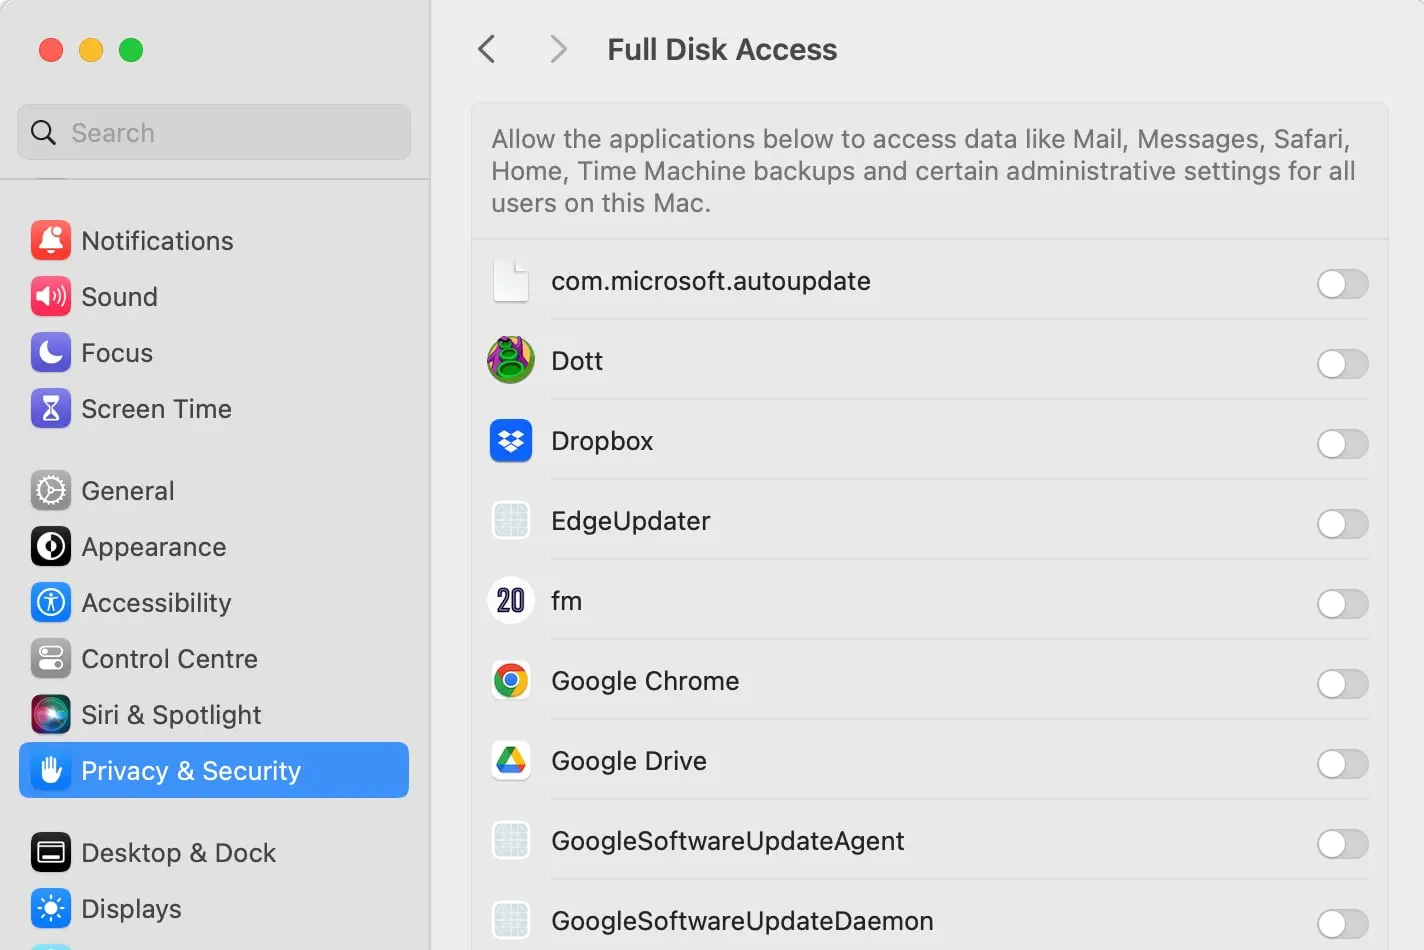
Full Disk Access 💽
Full Disk Access is a feature that lists all the applications that have unrestricted access to your Mac. Threat actors that create harmful trojans, spyware, keyloggers, etc., will ultimately aim to gain access to this area as it essentially makes them the system administrator. If they’re successful, they can inflict some serious damage. Therefore, if malware or a virus has indeed made its way onto your system, it could appear here.
Step 1: Open the System Settings app and go to Privacy & Security > Full Disk Access.
Step 2: Here, you can check which apps of yours have complete access to your Mac’s disk. You can temporarily revoke access by switching the toggle to the disabled position, or remove an app from the Full Disk Access section entirely by selecting it, then choosing the Minus button at the bottom of the list.
Step 3: If an app is listed in the Full Disk Access section and you don’t recognize it, make sure you remove it from your system using the above methods.
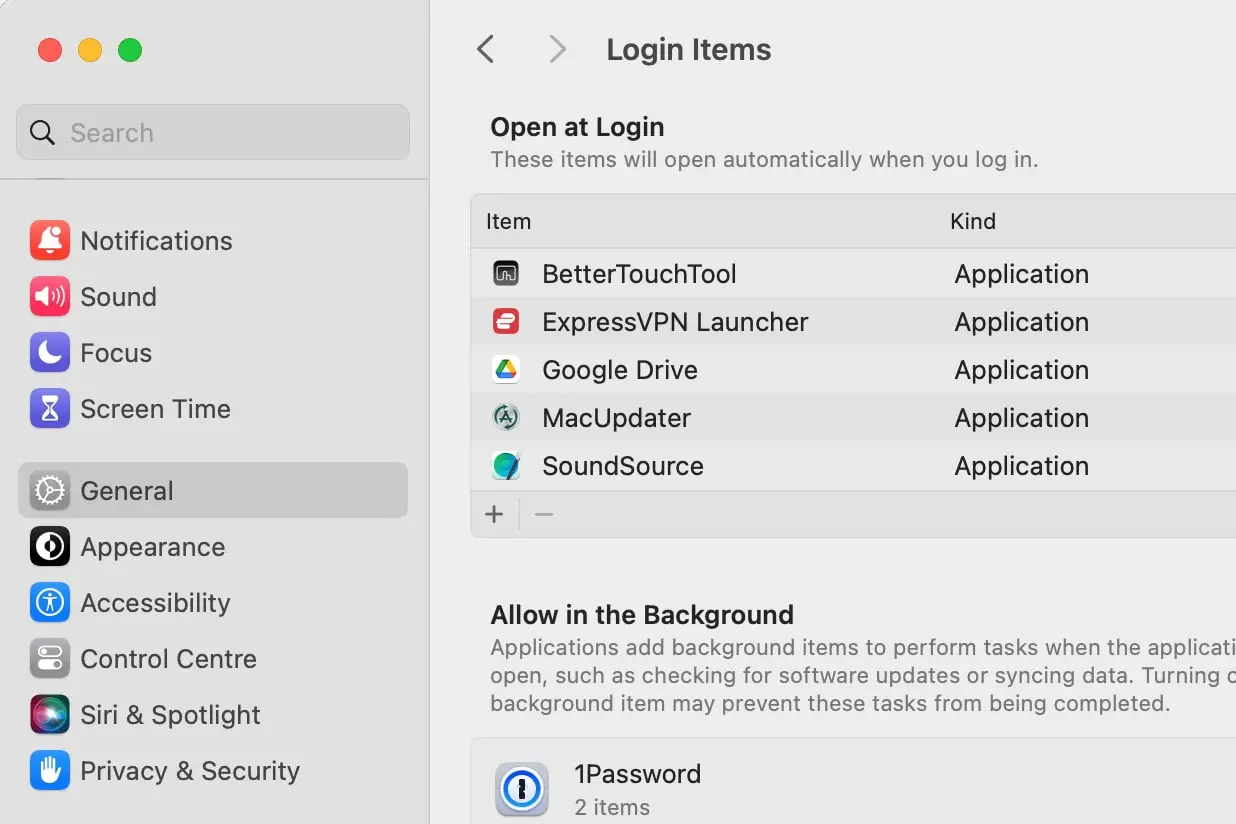
Login Items 👥🔑
Another way to manually check for malware on a Mac is through Login Items. As its name suggests, it controls which applications boot up alongside your system. Using this feature can also prove to be an effective way to check your Mac for viruses and malware.
Step 1: Open the System Settings app and go to General > Login Items.
Step 2: Check the list at the top of the app. If you don’t recognize any entries, Google them to check what they are. If they are malware (or you simply don’t need them to load when you start up your Mac), select them, then choose the Minus button at the bottom of the list. If an app or process turns out to be malicious, remove it using the steps above.
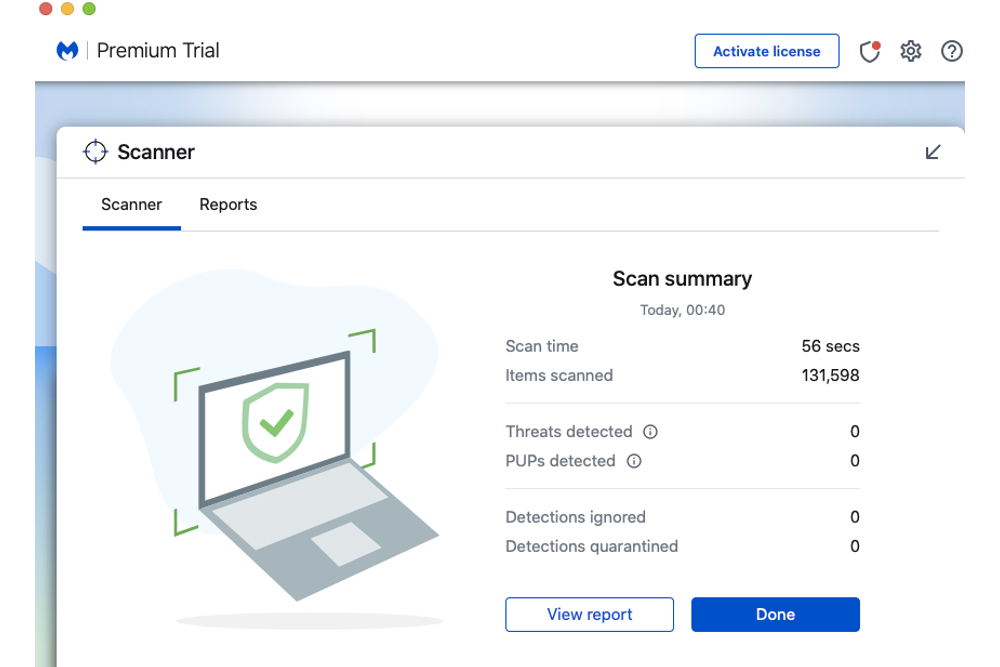
Antivirus and Malware Scanner Apps 🛡️💾
If you do think you have a malware infection, you need to know how to remove it. Alongside the manual methods listed above for checking malware, there are a multitude of Mac-based antivirus and malware scanners. One such app is the popular Malwarebytes, which lets you scan your Mac for free (it also has a paid-for version).
Step 1: Download and install the app.
Step 2: Run the scan and await the results.
Step 3: If there are any malicious files such as adware or spyware discovered by Malwarebytes, select the Quarantine Selected or Delete button to remove them all from your Mac.
Premium programs are also effective in rooting out any malware and viruses. As a general rule of thumb, consider purchasing apps from leading digital security companies such as McAfee, Norton, or Bitdefender.
And that’s it! By following these steps and being proactive in protecting your Mac from viruses and malware, you can ensure that your system remains safe and secure. 🛡️🚀
Related Topics: – How to get Spotify on a MacBook, Mac Mini, or iMac – How to format SD cards on Mac (and common issues and fixes) – Best refurbished MacBook deals: Get a MacBook Air for $165 and more 🛒💻
References: 1. Find Passwords on a Mac 2. Image: Activity Monitor – ENBLE 3. Image: Macbook Air – Image used with permission by copyright holder 4. Image: Full Disk Access – ENBLE 5. Image: Login Items – ENBLE 6. Image: Malwarebytes Scan – Image used with permission by copyright holder
Have you ever encountered viruses or malware on your Mac? How did you deal with it? Share your experiences with us in the comments below! And don’t forget to share this article with your friends to keep their Macs safe too! 🙌✨


